Adjusting Color Temperature | How to Set the Right Mood for Your Videos
What Is the Color Temperature Effect? — Definition & Purpose: Have you ever watched a video that felt strangely “off”—where skin looked too orange under indoor bulbs or scenes outdoors looked bluish and cold? That’s where color temperature steps in.
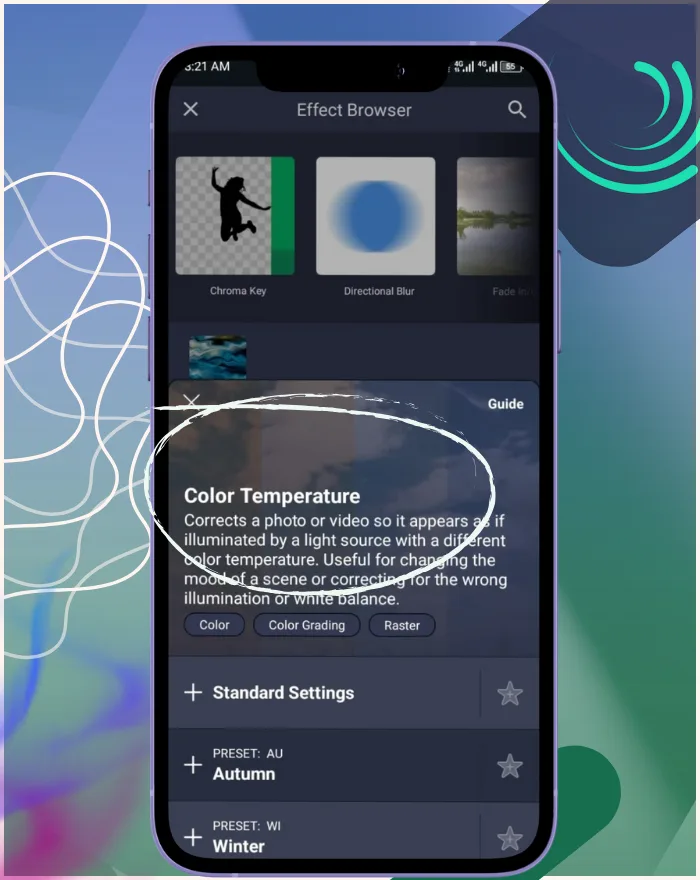
Quick Answer: Color temperature in video editing refers to adjusting the warmth or coolness of light, measured in Kelvin (K), to correct white balance or create specific moods. This how to adjust color temperature in video editing guide explores the color temperature Kelvin guide for videos and best color temperature settings for mood in videos.
In visual editing, color temperature describes the warmth or coolness of light in a scene, measured in Kelvin (K). Adjusting it can completely transform how your footage feels.
The Color Temperature effect lets editors fine-tune the balance of light so visuals appear natural, or intentionally stylized. For example, you can fix the yellow tint caused by tungsten lights or add a golden glow to make a sunset scene more romantic. At its heart, this effect is about controlling mood: warm tones evoke coziness and intimacy, while cool tones suggest distance, modernity, or even melancholy. Emphasizing white balance correction and video lighting mood enhances the overall impact.
How Color Temperature Works — Technical Mechanism & White Balance in Video Editing
Behind the artistry lies simple science. Every light source emits a color temperature, measured in Kelvins:
- Lower values (around 2,000–4,000K): warm, reddish-orange light like candles or sunsets.
- Midpoint (5,000–6,500K): neutral daylight, considered “true white.”
- Higher values (7,000–10,000K): cool, bluish tones like overcast skies.
Think of Kelvin as a thermometer for light’s mood—fire on one end, ice on the other. As of Alight Motion 5.0.273 (Android, Dec 2025) or iOS 6.2.47, color temperature supports smoother adjustments for precise Kelvin scale in editing.
When a camera records a scene, it interprets white differently depending on the light source. If uncorrected, this can lead to “color casts”—a blue tint under fluorescent lights, or orange under incandescent bulbs. Adjusting color temperature is essentially a manual override, telling your editing software: “This is what white should look like.”
Correct white balance ensures skin tones look realistic, skies retain their natural blue, and overall visuals feel balanced.
Key Properties & Parameters of the Color Temperature Effect
Why Adjust Color Temperature? Use Cases & Benefits
Correcting White Balance / Removal of Color Casts
A scene shot under the wrong lighting can look unprofessional. Adjusting temperature restores neutrality, ensuring whites look truly white and colors appear accurate. In 2025, apply for AR videos or AI-enhanced reels where white balance correction is crucial.
Establishing Scene Mood & Emotional Tone
Warmth can suggest intimacy (a family dinner, golden-hour romance). Cool tones suggest detachment or sleek futurism. By adjusting temperature, you’re not just correcting visuals—you’re shaping emotion through video lighting mood.
Consistency Across Shots / Matching Lighting
Ever noticed when two shots from the same project don’t match, one looking yellowish and the other bluish? Adjusting color temperature aligns different clips, giving your project a polished, unified feel.
How to Adjust Color Temperature in Video Editing (Step by Step)
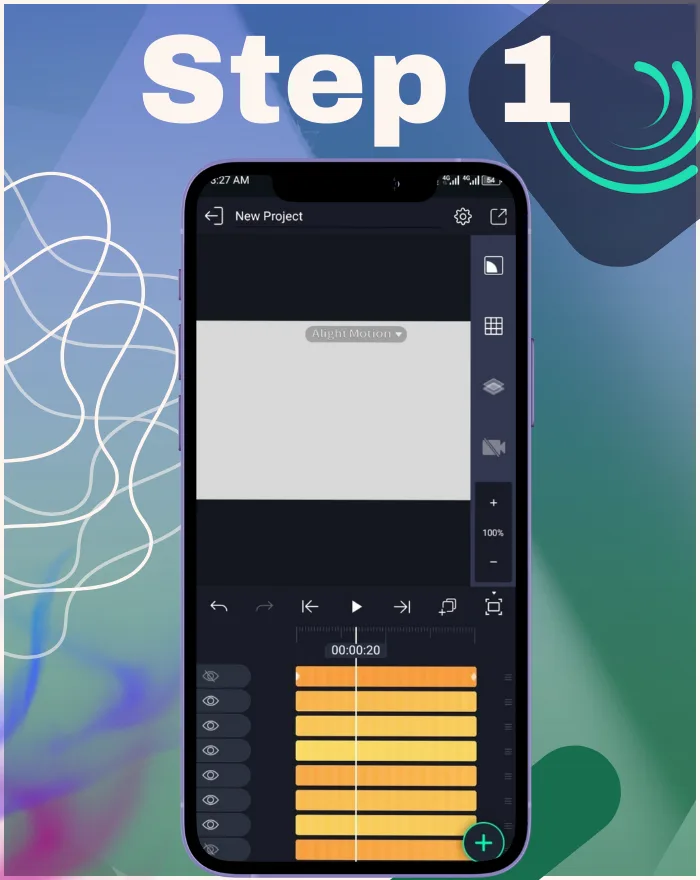
Start with White Balance & Neutral Reference
Identify a neutral area in your footage—a white shirt, a gray card, or a piece of paper. This acts as your anchor point for correction. Leverage iOS 18+/Android 15 for real-time previews during this step.
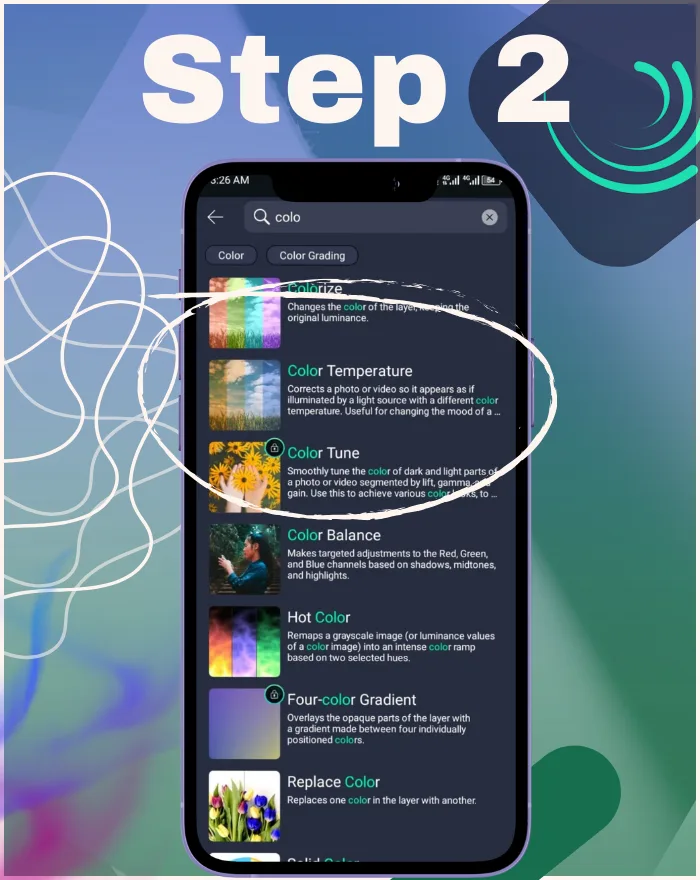
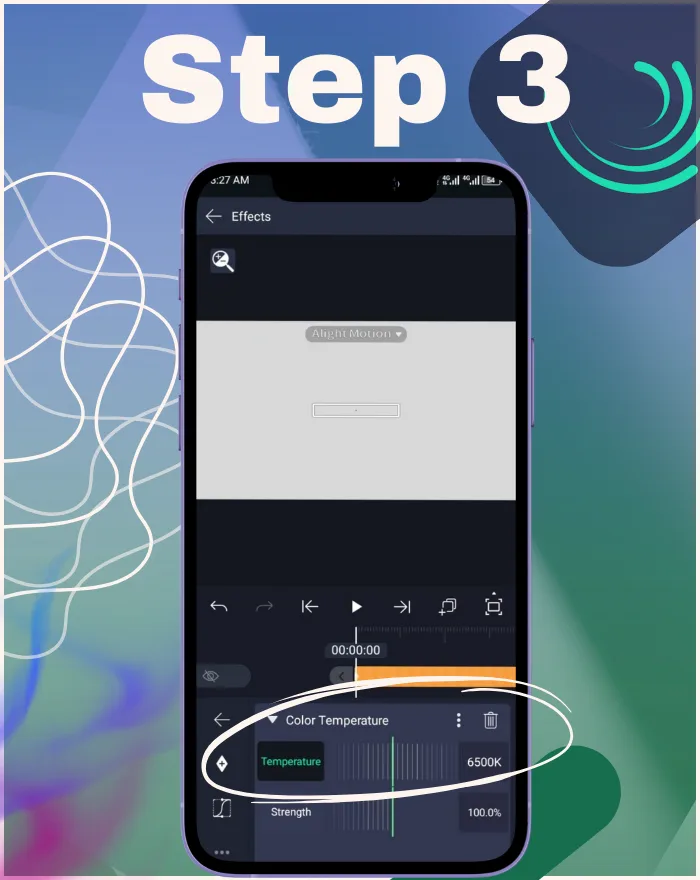
Adjust the Temperature Parameter
Move the slider until whites appear neutral and skin tones look natural. Remember: lower = warmer, higher = cooler.
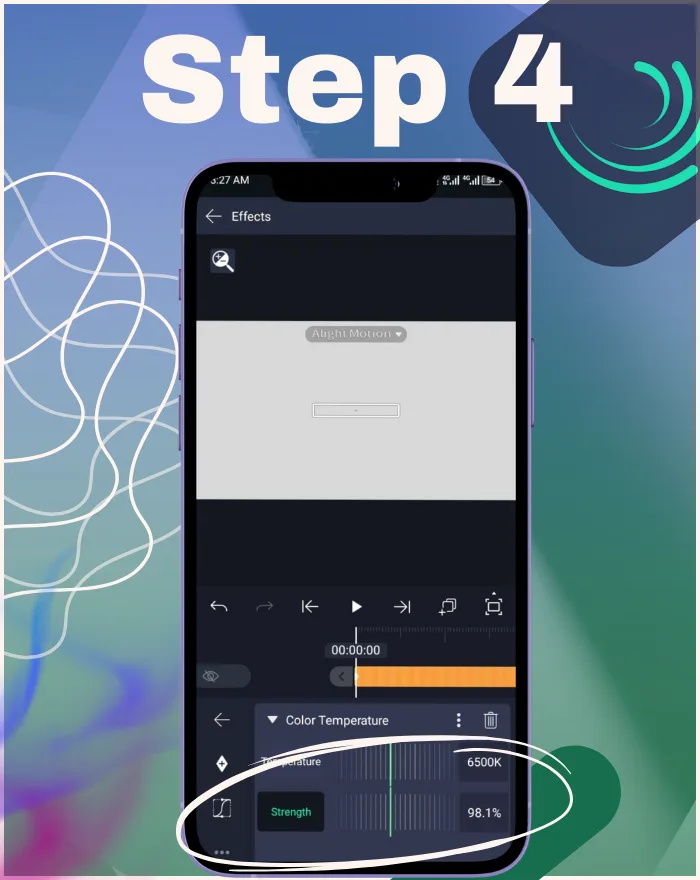
Set Strength / Blend of the Effect
Fine-tune how much the adjustment blends with original footage. Strong adjustments may be needed for correction; lighter ones often work best for mood changes.
Preview & Fine-Tune Across Scenes
Don’t stop at one clip—play through your sequence. Subtle tweaks may be necessary for consistency.
Pro Tip: If whites still look gray after adjusting temperature, try combining it with exposure correction for a cleaner result.
Creative Techniques & Variations
Warm Sunset / Golden Hour Look
Lower the temperature to around 4,000K with reduced strength. This adds soft golden hues, perfect for romantic or nostalgic edits. Inspired by 2025 minimalist trends in apps like Kite AI, use cool tones for tech content alongside warm variations.
Cool / Modern / Sci-Fi Tone
Raise the temperature into the cooler range. Blue tones create a futuristic vibe, ideal for tech promos or cityscapes at night.
Mixed Lighting or Day-Night Transitions
Blend warm and cool adjustments to mimic different times of day or mixed sources like neon + tungsten.
Color Ramping & Keyframing Temperature Over Time
Animate the temperature parameter for dramatic effect—transition a warm sunrise into a cold evening with gradual keyframes.
Color Theory & Emotional Impact
Psychology: Warm Tones vs Cool Tones
Warm tones (reds, oranges) feel inviting, cozy, and emotional. Cool tones (blues, cyans) feel distant, professional, or tense. By manipulating temperature, editors guide audience perception without a single word spoken.
Kelvin Chart Examples (1000K–10000K) & Moods
Table: Kelvin Scale Chart for Video Lighting Moods and Examples
| Kelvin (K) | Lighting Example | Mood/Effect |
| 2,000K | Candlelight | Intimate, nostalgic |
| 3,500K | Indoor tungsten | Homely, cozy |
| 6,500K | Neutral daylight | Balanced, clear |
| 8,000K+ | Overcast skies | Cold, futuristic |
Tools, Software & Platform Tips
Built-in Tools (Alight Motion, Premiere, DaVinci, Mobile Apps)
Most modern editing apps—from Alight Motion on mobile to DaVinci Resolve—offer a color temperature slider or white balance tool. Even smartphone editors include basic temperature adjustments. With 2025 updates, use enhanced AI in Premiere/DaVinci for auto temperature correction to streamline workflows.
AI / Auto Correction Tools & Plugins
Many tools now offer AI-powered auto white balance. Plugins can analyze footage and automatically adjust temperature, saving time while maintaining accuracy.
For deeper learning, check trusted cinematography resources like Adobe Premiere Pro’s official guide or lighting references from ARRI
Common Issues & Troubleshooting
Oversaturation or Unnatural Skin Tones
If skin looks too orange or blue, scale back strength and double-check your Kelvin value.
Color Casts / Imbalance After Adjustments
Mixing light sources (fluorescent + tungsten) can make balancing tricky. Use masks or localized adjustments.
Flicker or Inconsistency between Shots
Ensure uniform settings across clips. Flicker often happens if auto white balance was used during recording—lock values in editing for consistency.
Quick Fix Checklist:
- Always set temperature consistently across a sequence.
- Avoid extreme adjustments that distort skin tones.
- Use localized correction when multiple light sources are present.
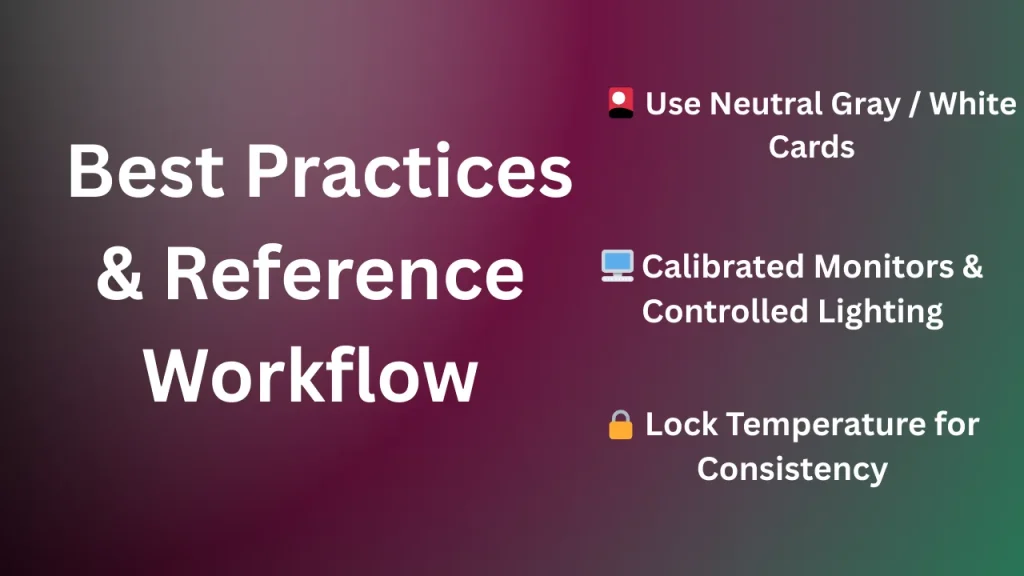
Best Practices & Reference Workflow
Use Neutral Gray / White Cards During Shooting
Capturing with a reference card ensures post-production is easier and more accurate.
Calibrated Monitors & Controlled Lighting Setup
What looks correct on your uncalibrated monitor may not be accurate. Professional editors always calibrate their displays.
Locking Temperature for Scene Uniformity
Once you find the right balance, apply the same settings across clips in the same environment.
How to Adjust Color Temperature for Indoor Videos?
Templates, Presets & Sample Recipes
Preset Kelvin Settings for Common Scenes
- Sunset vibe → 3,800–4,500K (Strength 70–80%)
- Neutral daylight → ~6,500K (Strength 100%)
- Futuristic blue → 7,500–8,500K (Strength 60%)
Downloadable Presets & Usage Tips
Many editing platforms offer downloadable LUTs and presets. Use them as starting points, then customize your footage.
Advanced Techniques: Combining Temperature with LUTs & Masks
For advanced users, temperature can be layered with LUTs (Look-Up Tables) or masking techniques. For example, you can apply a warm LUT to foreground subjects while keeping the background cool, simulating mixed lighting in a city scene. This opens creative freedom for cinematic storytelling.
- In my experience editing client projects, combining temperature with masks creates depth in scenes.
- A 2025 project using temperature for AR scenes highlighted how cool tones enhance immersive tech visuals.
Color Temperature vs Other Editing Tools
- Tint adjustments: Change color bias (green/magenta), not warmth.
- LUTs: Apply predesigned looks but less flexible.
- Grading tools: Broader creative control, but color temp is the fastest way to fix white balance.
Conclusion
Color temperature is more than a technical adjustment—it’s a storytelling tool. By warming or cooling your footage, you can correct flaws, unify shots, and evoke emotion.
Now it’s your turn: open your editing software, play with the color temperature slider, and notice how each change shifts the story your visuals are telling. With practice, you’ll not just fix white balance—you’ll create mood, atmosphere, and cinematic impact. This color temperature Kelvin guide for videos underscores the best color temperature settings for mood in videos through white balance correction.
What’s New in 2025: Improved previews for temperature adjustments—search ‘AI white balance’ in apps like Alight Motion for enhanced features. Link to alightmotion.com for 2025 updates on color effects. If publishing this article, consider adding a canonical tag to the primary URL to avoid duplicate content issues with similar tutorials.